How To Fix Samsung Galaxy Note 2 “Not Registered On The Network”
In this article, we are going to show you how to fix “Samsung Galaxy Note 2 not registered on the network” issue. This is a common error on the Galaxy Note 2. According to users who face this problem, whenever they try to make any calls or texts, “not registered on the network” message appears on the screen. One user said that his Wi-Fi is working normally, GPS is working fine, Data Edge and 3G are also working well, but whenever he tries to make any calls or try to send messages, he has those not registered on the network problem faced with the wrong IMEI. The solutions are given below.
See also: Restore Galaxy Null IMEI # and fix Not Registered in Network
Solution for Galaxy Note 2 “not registered in the network”
Here is a step-by-step process to resolve the Note 2 “Not Registered on the Network” and you can follow these steps to get rid of such problem. This process is only for Samsung Galaxy Note 2 GT-N7100 model. People using the Galaxy S3 GT-I9300, S4 GT-I9500, and S4 GT-I9505 models can also follow the same process.
Things you need to do before you start are:
1. Back up all important data of your Note 2 in case this process corrupts the data.
2. Download the MODEM.tar.md5 file and then extract it. Galaxy Note 2 (International), choose your version.
3. Download and unzip Odin3.
4. Now close Samsung Kies, turn off antivirus software and disconnect any devices connected to your computer.
Steps:
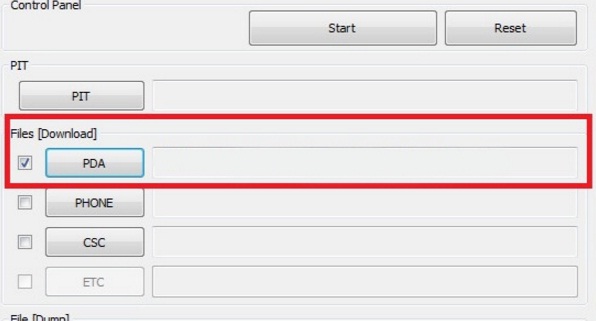
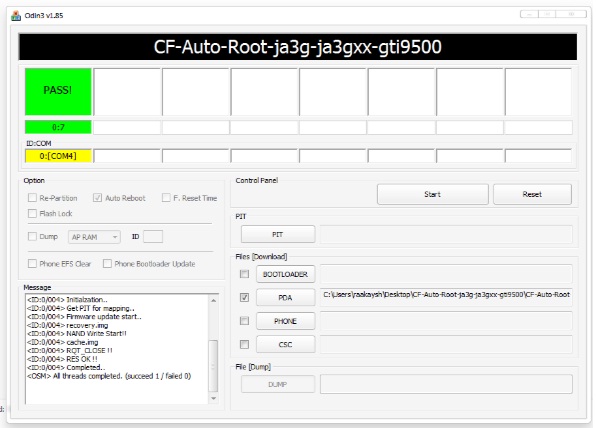
1. Start Odin3 as an administrator. Click the PDA button and navigate to the MD5 file that you downloaded earlier.
2. Now switch off your device and make sure that it is completely switched off.
3. Press and hold the Volume Down button, Home button, and Power button together until your device goes into download mode.
4. Then press the Volume Up button to continue.
5. Connect your Galaxy Note 2 to your computer using the USB cable. Wait a few seconds until you get a character in Odin (ID: COM section) and it says “Added” in the message field.
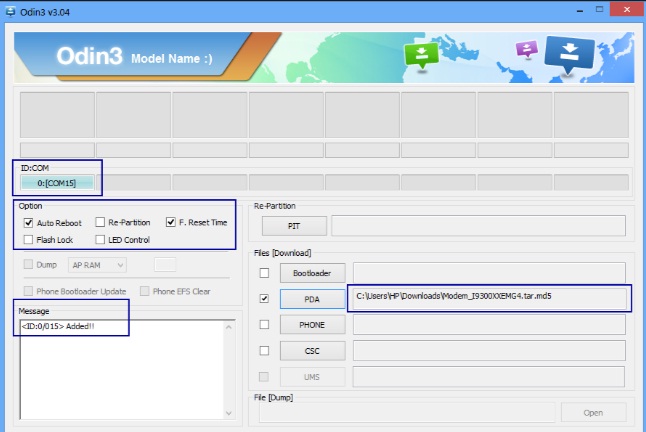
6. Make sure that “Repartition” is not selected there.
7. Click the “Start” button and wait a few minutes until you see the “PASS” message. That’s it
Do not turn off your device or disconnect the USB cable during this process. Now check your device – it will work perfectly.
Related: iHow to Install 4.4 KitKat on Galaxy Note 3.4axy Note 3?