How to bypass iCloud activation iPhone 4 iOS 7.1.2 [Mac]
ICloud activation is a feature on the iOS device that is used to protect your device. For example, it can protect the iPhone from theft. ICloud Activation appears on an iPhone when performing an initial setup after upgrading iOS, resetting all content, or restoring the iPhone. The user needs to enter the Apple ID that was used last time in order to bypass iCloud activation. This function is displayed if the user who has this iPhone and logs in with his Apple ID in iCloud in the settings of the iPhone and activates “Find my iPhone” by default. Only the user who knows this Apple ID can bypass the iCloud activation and can then use the iPhone again. For someone who doesn’t know the Apple ID, the iPhone is stuck in iCloud activation and the person cannot use the iPhone.
ICloud activation can reduce the number of stolen iPhones. This is because the thief will not be able to use the iPhone if he cannot bypass iCloud activation when restoring the iPhone or the iPhone has been locked and remotely erased by users using one of the functions in “My iPhone search ”is used. But have you ever experienced such bad luck as my friend, where his iPhone 4 was not linked to a certain Apple ID, then someone who accessed his iPhone logged into the Apple ID in iCloud and found Find My iPhone activated. His iPhone locked and self-erased and he was facing iCloud activation and the Apple ID wasn’t the Apple ID he knew. What bad luck! Here we want to share how to bypass iCloud activation iPhone 4 iOS 7.1.2.
If you have the receipt or official POP (Proof of Purchase) from Apple Authorized Reseller, you can contact Apple Care or an Authorized Service Provider to remotely open iCloud activation. But if you don’t have it, or if you’ve lost it, here’s a guide to follow.
Also Read: How to Find Your Missing iPhone / iPad / iPod Touch Using Find My iPhone
Contents
How to bypass iCloud and activate iPhone 4 iOS 7.1.2
preparation
- These instructions are for the iPhone 4 with iOS 7.x or the latest iOS 7.1.2
- These instructions are intended in the event that your iPhone 4 is stuck in the “Activated iPhone” screen during the initial setup, as shown in the image below.
What you need:
- Mac OS X with the latest iTunes and Java installed on it
- 30-pin connector
- Internet connectivity
Steps to prepare:
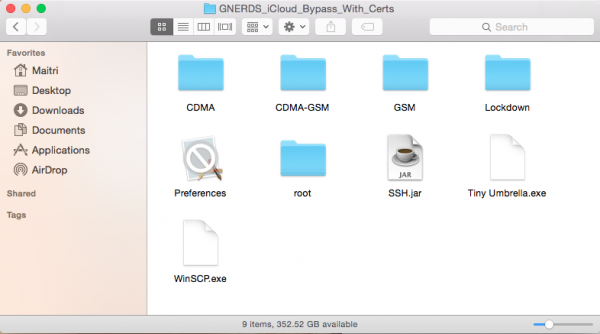
- Download GNERDS_iCloud_Bypass_With_Certs.zip and unzip this zip file. You will find this file in the result folder of the extraction:
- Download Cyberduck for Mac
- Download Reiboot
- Connect the iPhone 4 to the Mac using the 30-pin connector
- Put your iPhone 4 in DFU mode: Press and hold the power button and the home button until the iPhone restarts. Wait 5 seconds and release the power button, but hold the
- Home button still pressed. If it succeeds, your iPhone’s screen will remain dark
Step 1:
- In the Extraction Results folder, as you could see above, double-click SSH.jar
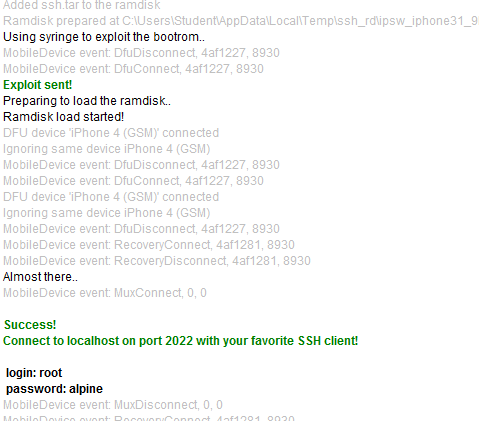
- If your iPhone is already in DFU mode, this application will do its job automatically and wait for the green words to appear telling you that your iPhone is now open to be accessed as SSH.
- After that, open the Terminal application on your Mac.
- Enter: ssh [email protected] -p 2022 Password: alpine
- Enter: mount.sh
Step 2:
- Open the Cyberduck application
- Click on Open Connection and select SFTP with Server: localhost and Port: 2022
- Username: root and password: alpine
- In / mnt1 / var / Applications, enter the setup.app file and delete setup.app
- Go to / mnt1 / Applications /
- In the Finder, drag the Preferences.app file in the GNERDS_iCloud_Bypass_With_Certs folder to / mnt1 / Applications /. This file should replace Preferences.app there. If there is a “Replace or Overwrite” warning, select Replace or Overwrite.
- In the same way as described above, replace the files data_ark.plist, device_private_key.pem and device_public_key.pem di / mnt2 / root / Library / Lockdown. You can find the same file in GNERDS_iCloud_Bypass_With_Certs
Step 3:
- When you’ve done all of the above, reset your iPhone by holding down the power and home buttons
- The iPhone boots up and goes into recovery mode
- Launch the Reiboot app and click Exit Recovery Mode
- Finished. The iPhone starts directly on the home screen without an activation screen
Also Read: How To Fix iPhone And Prevent It From Getting Hot


