3 settings you should change
The iPhone has become a real all-rounder and has replaced the digital camera for many people. Apple knows this and is always trying to improve the camera app while keeping it simple. Disadvantage of forced simplicity: Many practical settings are hidden. We’ll reveal 3 of them right away, which ensure that the photos with your iPhone get even better.
The camera in the iPhone has come a long way. Did you know that she couldn’t even record videos in the very first iPhone from 2007? The results that the iPhone 13 Pro delivers are all the more impressive.
Thanks to the latest iPhones, many people no longer even need a digital camera. If you want to get more out of your iPhone camera than you already have, you should take the following tips to heart. They not only save time and nerves, but can also provide better results.
Tip for the iPhone camera: change the format
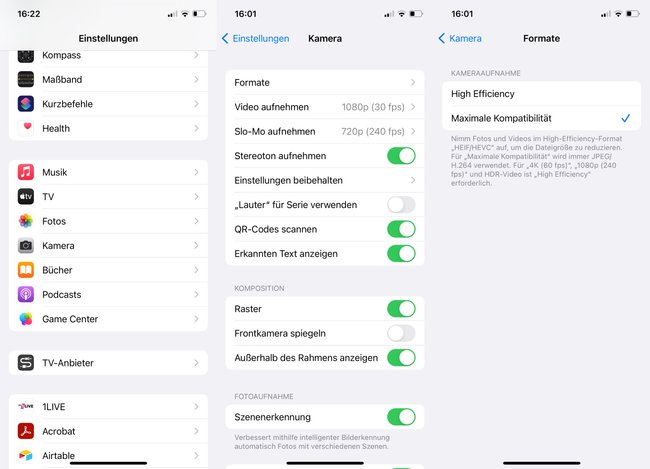
By default, the iPhone camera shoots photos in HEIF format. This is also good because it reduces the file size. Big disadvantage, however: Many programs cannot open the HEIF format. I myself have had the problem several times in e-mail correspondence with insurance companies who could not open my photos. So if the best possible compatibility is more important to you than saving memory, deselects the HEIF format. How to do it:
- Open settings
- go on camera
- Then open “Formats”.
- Change the selection from “High Efficiency” to “Maximum Compatibility”.
iPhone Camera Tip: Keep Settings
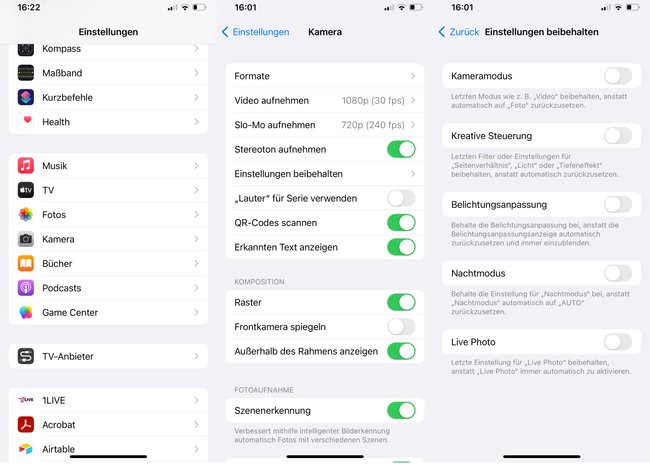
The default settings in the iPhone camera are not for everyone. Some prefer to take pictures in 16:9 instead of 4:3, others like photos with higher exposure. It’s all the more annoying when the iPhone camera goes back to the default setting after each photo session and you can change all the settings again. This need not be! the iPhone camera can also “remember” the last settings and it goes like this:
- Open settings
- go on camera
- Select “Keep settings”.
Here you can then choose which of the settings you want to keep permanently.
Do you already know these tips for Google Photos?
iPhone Camera Tip: Enable Grid
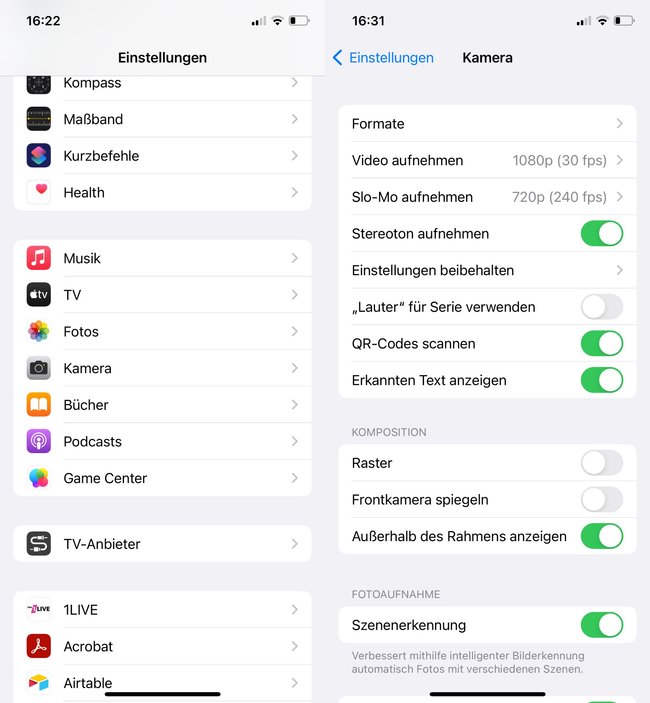
The grid in the iPhone camera is deactivated by default – a real absurdity from Apple, as every photographer knows. Because that Grid helps with alignment and image composition, in which it divides the preview image into 9 equal rectangles. In this way, you can take advantage of the principle of the “golden ratio” and perfectly stage your motif. It works like this:
- Open settings
- go on camera
- Set toggle on “Grid”.
And if the photo is already in the can, you can later lend a hand again – with photo apps. Snapseed, Photoshop and Co. get the last bit out of the snapshot again: beautify photos: 5 apps for Android & iOS.


