Use Raspberry Pi as a NAS – installation and setup
If you don’t want to buy an expensive NAS, you can simply build it yourself with the Raspberry Pi. We explain how it works and what advantages and disadvantages it has here at GIGA.
A NAS is network storage that provides the devices in the network with large amounts of storage. In contrast to a simple external hard drive, a NAS has the following functions:
- low power consumption in continuous operation
- available everywhere in the network (for laptops, PCs, smartphones, tablets, …)
- easy operation and setup of the NAS via a browser user interface
- expandable with services such as mail server, VPN server, FTP server, download server, …
Contents
NAS vs. Raspberry PI NAS: differences, advantages and disadvantages
The “disadvantage” of a NAS from Synology or QNAP is the price: A good entry-level NAS like the Synology DS220j costs including reliable hard drives from WD Red (2 x 2 TB) around 300 euros. But if you want to get your first experience with a NAS, you can build your own NAS with a Raspberry Pi.
| NAS | Raspberry Pi NAS | |
| price | Expensive | Cheap |
| Energy costs | Relatively low | Very little |
| mobility | Mediocre | Very good |
| Processor power | Medium to high | Low |
| Features & expandability | Very good | Mediocre |
But you should keep in mind that the management and functions are not on the comfortable level of a purchased NAS system. While a professional NAS can stream a film to several network participants at the same time, a Raspberry Pi NAS will quickly reach its limits. For testing and trying out or as a DIY project for learning, you can convert your own Raspberry Pi into a NAS.
Set up Raspberry Pi as NAS
1. You need that
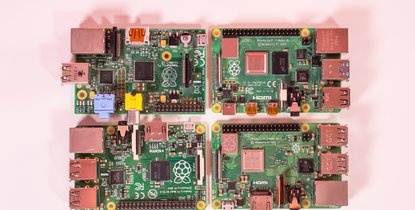
- A Raspberry Pi (preferably the latest model) ~ 58 euros
- Official Raspberry Pi power supply (5 volts) or compatible mobile phone charger for power connection ~ 10 euros
- microSD card (at least 4 GB) for NAS operating system ~ 5 euros
- USB hard drive as NAS storage for the Raspberry Pi ~ 64 euros
(We do NOT recommend a USB stick as a NAS data carrier, as these are quite error-prone in continuous NAS operation.)
Approximate costs when purchasing all components: 137 euros
2. Install Raspberry Pi OS Lite
As a NAS operating system, OpenMediaVault used. However, in order to be able to install OpenMediaVault version 5 or higher, Rasbperry OS must first be installed on the Raspberry Pi. Opens the raspberrypi.org download website and download the “Raspberry Pi OS Lite” image as a ZIP file. “Raspberry Pi Lite” has no graphical user interface. However, this is also not required because you will later control OpenMediaVault via an external computer over the network.
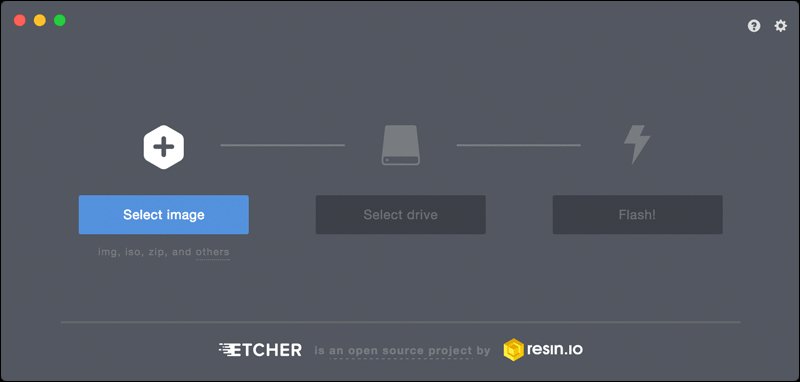
Transfer the image to the microSD card of the Raspberry Pi. Use the free Etcher tool for this. In the program you first choose with “Select Image“The ZIP file from” Rasperry Pi OS Lite “and then via”Select drive“Target the microSD card. Confirmed with the button “Flash!“.
Once the process is complete, you slide the microSD card into the Raspberry Pi, connect it to the power supply and start it. Either you operate the Raspberry Pi with a keyboard and a screen or you control it remotely via SSH over the network. We use SSH here.
After the Raspberry Pi has booted, enter the standard username and password:
- User name: pi
- Password: raspberry
If the login doesn’t work, you may have set the English keyboard layout (Y and Z are swapped). After logging in, you update the Raspberry Pi with the following command:
- sudo apt update && sudo apt upgrade
Restarts the Pi with:
At this point, we recommend assigning a fixed IP address to the Raspberry Pi in the router settings.
3. Install OpenMediaVault
Log in to the Pi with your username and password. Now you install the current OpenMediaVault version from the GitHub repository using an installation script. Simply enter the following command and confirm with [Enter]:
- wget -O – https://github.com/OpenMediaVault-Plugin-Developers/installScript/raw/master/install | sudo bash
Then restart the Rasperry Pi and connect the USB hard drive.
4. Set up OpenMediaVault and USB hard drive
When you start the Raspberry Pi for the first time after installing OpenMediaVault, it takes a little longer than usual because certain basic settings are made. If you have not set up a fixed IP address for the Raspberry Pi, you have to find this out in the router settings. A Fritzbox router shows you the IP addresses of your network devices under “Home network“>”network” at.

Now open your browser on the PC, enter the IP address and press [Enter]. Log in to the OpenMediaVault homepage:
- User name: admin
- Password: openmediavault
For security reasons, it is best to change the password under “General Settings“>”Web administrator password“.
The hard drive is now set up. Click on the menu item “Data storage“>”Drives“. Selects the external hard drive. The name is probably “sda”. Click on “Clear“. As a method you choose “Fast“.
A file system will now be created on the deleted volume. To do this, click on the menu item “Data storage“>”File systems“. Accept the default setting “EXT4“. After the process you will see the data carrier in the column “status” when “On-line“. Click on “Include” and up “Apply“So that the Raspberry Pi NAS can write to the data carrier.
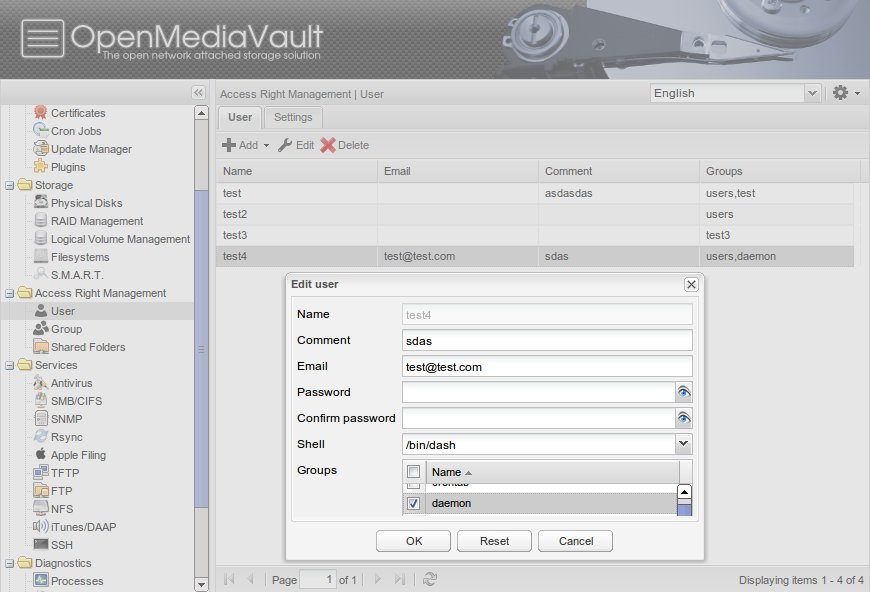
As with professional NAS systems, OpenMediaVault can also manage multiple users with different folder shares. You create a new user under “Access control“>”user“. Tap on “Add“. Assigns a user name and a corresponding password with which the user logs on to the NAS when accessing folders.
You create releases under “Access control“>”Shared folders“. Click on “Add“. Enter a name and choose as “drive“Select the data carrier that you just prepared. Under “Access rights“You set who is allowed to access the folder share. Then you can click the release on “Privileges“And set exactly who has read and write access to the share (read only, read and write, no access). Save the settings and click on “Apply“.
6. Set network protocols
Finally, the network protocols under “services“Must be set. To do this, activate “SMB / CIFS“. Then you have to specify for each network protocol that the corresponding shares are also displayed. To do this, select in the tab “Approvals“>”Add“The shared folder. Saves the settings.
7. Access Raspberry-Pi-Nas from the PC
Now you can access the Raspberry-Pi-Nas from the PC. Searches for networks in Windows, Linux or on the Mac. Connect to the NAS and enter the username and password that you previously created in OpenMediaVault during user management.
For further functions and extensions, you should have a look at the OpenMediaVault User Guide.