So you can control your iPhone’s document scanner from your Mac
No time right now?
No scanner at hand, but you have to send an analog document? If you are a MacOS user and have an iPhone or iPad ready, that’s no problem, because you can use the camera of the iOS device for this – and control it via MacOS.
Apple’s ecosystem has some nice tricks up its sleeve that you may not be familiar with. We recently reported on the practical function of the convenient cross-device copy-paste function, with which you can use content from one Apple device on another as if by magic.
Similarly practical and not completely new is the so-called camera transfer function, with which you can initiate the camera of an iOS device from the Mac and either take a photo or scan a document. The recorded content will then be pasted into a compatible application of your choice on the Mac. How does this work? We’ll explain it to you.
Contents
Using the iPhone as a scanner for the Mac – the requirements
First of all, you have to make sure that all software and technical requirements are met. Both devices must be close to each other and ideally connected to the same WiFi network. An active Bluetooth connection is also required. In addition, your Mac and your iOS device must be logged into Apple’s iCloud with the same Apple ID and two-factor authentication must be used. The latter has been mandatory since iOS 11 and MacOS High Sierra anyway.
On the software side, at least MacOS Mojave must be installed on the Mac and iOS 12 on the iPhone or iPad. On the Mac, in addition to the Finder, Keynote (from version 8.2 or newer), Mail, the Messages app, Numbers (from version 5.2 or newer), Pages (from version 7.2 or newer) and Textedit supported.
Use the iPhone as a scanner for the Mac – this is how it works
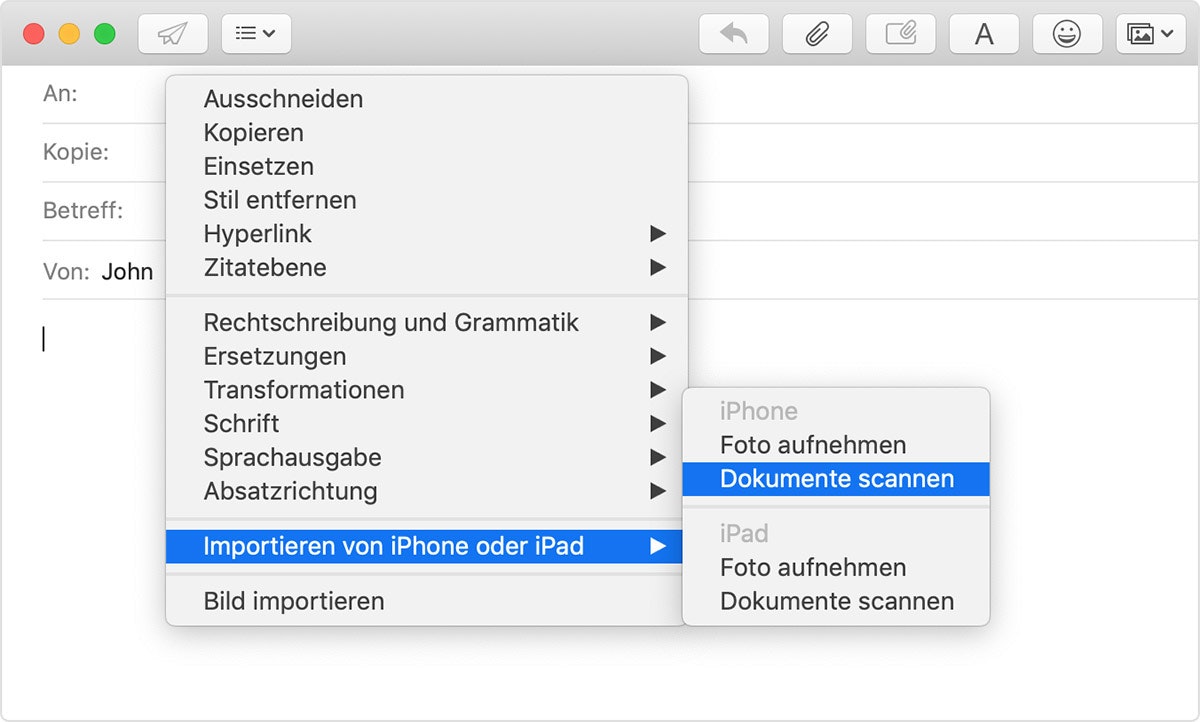
In the context menu you select “Scan document” and off you go. (Screenshot: t3n)
If all of the requirements are met, you can start scanning: Open one of the supported apps – you have to open a new window in the Finder -, now click the right mouse button or the right trackpad to display the context menu. Here you will find the setting “Import from iPhone or iPad” and select “Scan documents”.
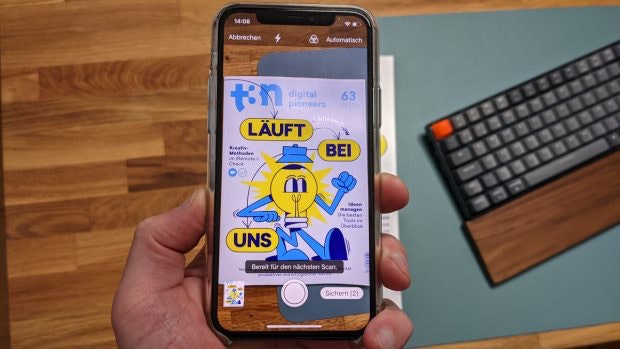
The camera app opens and you can get started. When you have scanned everything, tap on “Save”. (Photo: t3n)
If you have carried out this function, you now have to pick up the iPhone or iPad on which the camera for the notes function has opened as if by magic. Now all you have to do is select the appropriate camera section to scan the desired document and, after a successful scan, tap on “Save”. The documents then end up in the app of your choice. It is saved as a PDF in the Finder.
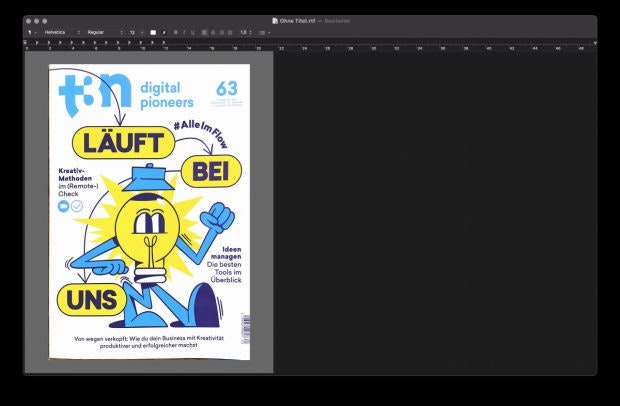
After saving the document in the camera app, it will appear in the respective application in no time at all. (Screenshot: t3n)
We became aware of the function, which is not new, but underestimated in our view, through the Tiktok-Kanal keyboard shortcuts (via The Verge).
More on the topic: iOS 15 and iPadOS 15: These iPhones and iPads should receive the next big update